
After Joomla is installed, the next critical step is initial configuration. These early decisions affect site stability, troubleshooting, SEO behaviour, and long-term maintenance. This tutorial walks through the configuration areas worth reviewing before you begin building content or installing extensions.
Before You Start
- You must be logged into the Joomla Administrator.
- Your site should load without installation warnings or errors.
- You do not need any third-party extensions.
- You will be greeted with at least one "Welcome" message; you can decide to hide or explore the steps.
Pre-Configuration
Before you get into the nitty-gritty of global configuration, let me take you through a few screens that you may encounter when you first log into your admin area. Usually, this will be a quick introduction to the various sections of your home dashboard.
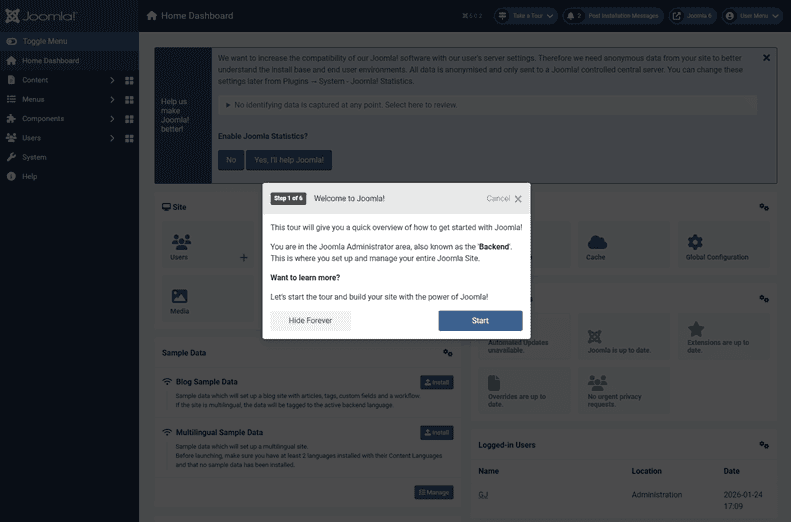
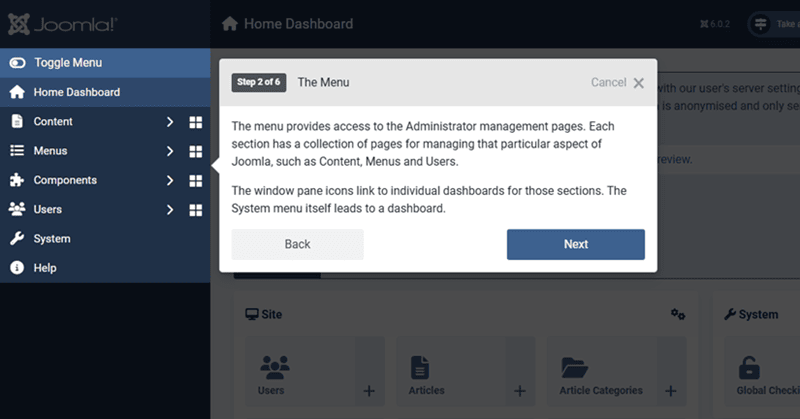
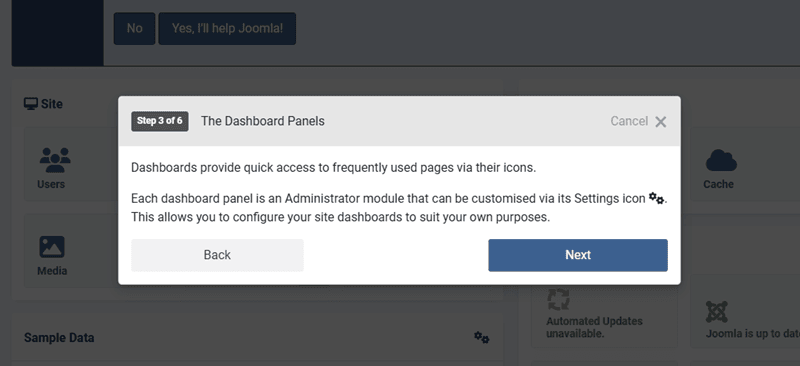
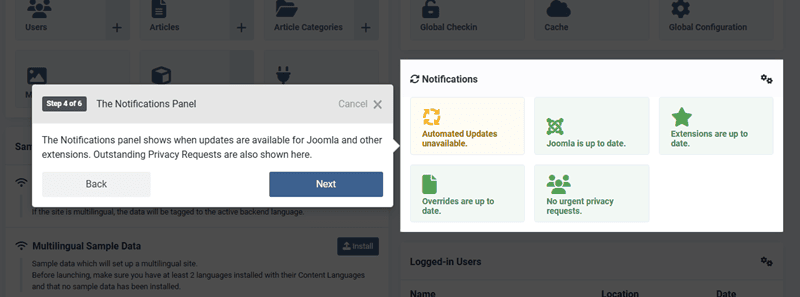
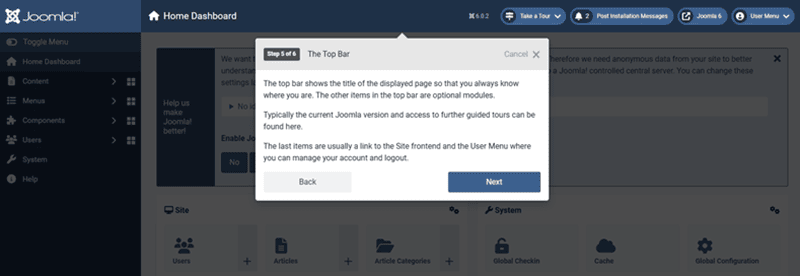
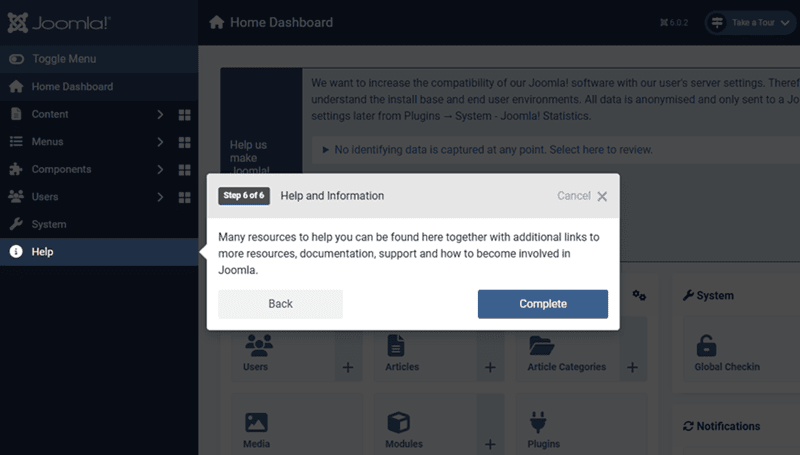
Once you have gone through the 6-steps after logging in, then we can move on to the global configuration.
Step 1: Open Global Configuration
Most foundational Joomla settings live in System → Global Configuration. This is where defaults are defined for the entire site.
Do not rush through this screen. Many issues later traced to “Joomla problems” originate from skipped or misunderstood settings here.
Step 2: Review Site Settings
The Site tab controls high-level behaviour and defaults.
Key Settings to Review
- Site Name: Used in the administrator and optionally in page titles.
- Front End Editing: Modules are set as the default, but I recommend setting this to "None".
- Default Editor: Choose the editor you intend to use consistently. I recommend starting with TinyMCE.
- Site Offline: Ensure this is disabled for a live site.
- Default Access Level: Usually Public for most sites.
Consistency matters. Changing editors or defaults later can introduce formatting or workflow issues.
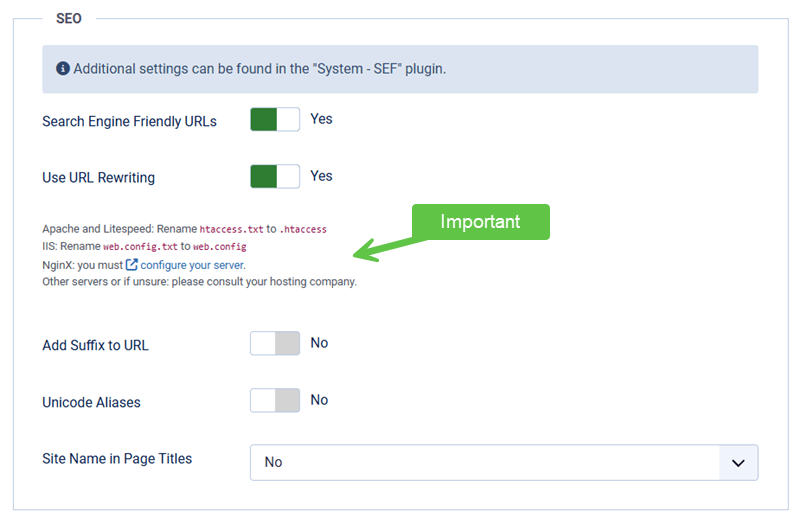
Step 3: Configure SEO and URL Settings
Joomla’s built-in SEO settings influence how URLs and metadata behave.
Commonly Reviewed Options
- Search Engine Friendly URLs
- Use URL Rewriting
- Add Suffix to URLs (often unnecessary)
- Unicode Aliases
These settings affect routing and URLs site-wide. Changes made later can impact existing links.
Step 4: Check System and Debug Settings
The System tab controls logging, caching defaults, and debugging behaviour.
Important Areas
- Error Reporting: Use “Default” or “None” on live sites.
- Debug System: Disabled unless actively troubleshooting.
- Cache Settings: Leave conservative defaults initially.
Overly aggressive caching or visible errors can confuse users and complicate diagnosis.
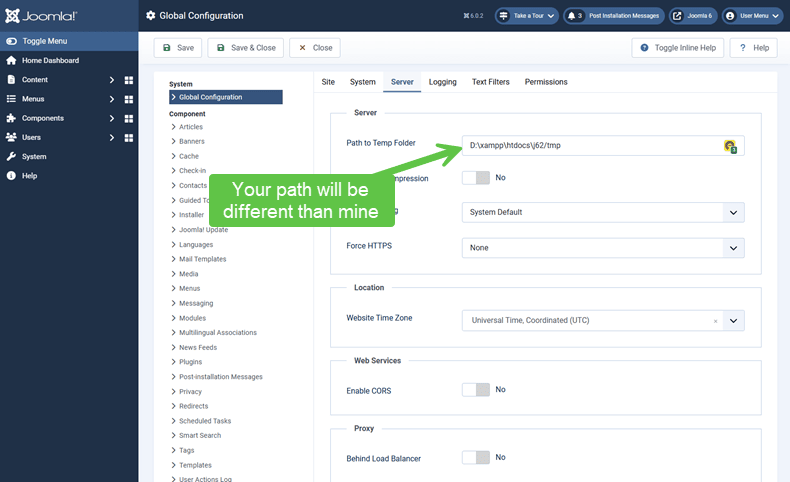
Step 5: Review Server Settings
The Server tab reflects how Joomla interacts with your hosting environment.
Items Worth Confirming
- PHP version and handler (at least, go with PHP 8.2)
- Database type and version
- Session handling method
- Session Lifetime: 15 minutes is the default, but I recommend you bump this up to at least 60 minutes while you learn Joomla.
- Path settings for logs and temporary files
Incorrect paths or unsupported PHP features are common causes of early warnings.
Step 6: Configure Email Settings
Joomla relies on email for password resets, notifications, and system messages.
Recommended Actions
- Set a valid “From Email” email address
- Set a "From Name" to the name you want to use
- Choose an appropriate mailer method (PHP Mail or SMTP)
- Send a test email
Email issues often go unnoticed until a password reset or notification fails.
Step 7: Save and Document Key Decisions
Once the initial configuration is complete:
- Save all changes
- Note any intentional deviations from defaults
- Avoid revisiting settings without a reason
Configuration drift is easier to prevent than to diagnose.
Verify Your Results
- The site loads without visible errors.
- Administrator pages behave normally.
- SEF URLs work as expected.
- Test emails sent successfully.
Common Issues
- Unexpected layout or URL behaviour: Menu item overrides may differ from global settings.
- Error messages visible on the front-end: Error reporting may be set too high.
- Email not sending: Hosting mail restrictions or incorrect SMTP details.
Related Tutorials / Next Steps
- Next: Choosing Core Settings That Affect Stability
- What to Review Before Building Content
- Installing Joomla on a Typical Hosting Environment
Taking time to configure Joomla thoughtfully at the start reduces surprises later and makes troubleshooting far more straightforward.